|
|
|
in the current middle ages |
|
|
To Nancy Qualls for teaching me to knit, to Becky Herring for her computer support, to Nancy Gorgorian, Susan Hadley, Beth Falkenberry and Michael Small for their modeling aid, to Brian Kelly for his alternate pattern, and to all the knitters in the Known World who asked for this. Finally a special thanks to Susan Tatreaux, aka Ly Daria de Tabriz, who lived through this with me and without whose help and confidence this book would not have been finished. |
|
|
Identical to the printed book, this online excerpt remains Copyright © Freeman E Teague 1989. Permission is granted to view the document online. No permission to download, copy, or further distribute this document is given, except as is necessary, and automatically performed when viewing HTML pages with web browsers. |
|
|
The purpose of this book is not to detail a history of mail within any one culture or time period. Nor is it designed to be the definitive work on the history of wire, mail, or armour of the then or current Middle Ages. Rather this is an instructional volume. This book is designed to give you a background in mail as an art and science. It is provided for the armourer so that he or she may create pieces of mail in the easiest and least expensive method, while adhering to most of the customs of the Middle Ages. There are a lot of photos in this book. It was designed that way to allow the reader/doer with a reference to the text. Some directions may seem obtuse or bizarre, but they are the best that I have found, and have worked for many years, through many thousands of pounds of mail. This book does not cover all pieces possible. Obviously by the very nature of mail, anything can be covered, from your pet to your floor. This book, however, does cover the items most requested from myself and others. Very ornate headpieces, such as worn in themovie The Sword and the Sorceror are not covered in this tome, but will have another volume dedicated to it and other ornamental pieces of jewelry, at some later date. I hope that this book helps you attain a greater degree of versatility in
your craft, or a greater speed in your knitting. Using these techniques we
have been able to exceed three hundred pounds of knitted mail per month.
|
|
|
EARLY WIRE Wire in its earliest form was strips of metal twisted together to form
strands. These wrapped pieces were sometimes smoothed by pulling them
through a small hole or die to take off some of the rough edges. Wire
drawing does not appear until later times, approximately the Viking
expansion, 700 to 1000 AD.
Drawing was the process of taking one diameter of wire and pulling it through a conical die that reduced the diameter of the wire by some degree. This could only be done with work-hardened metals and could not be done with lead or tin. The wire was first groover to fit into the die by using the swagging groove found on many of the mideavil anvils. This swag allowed the wire to fit into the reduced hole enough for the metalsmith to begin pulling it through. This process hardened the wire to the point that annealing was necessary to soften the metal so that it could be pulled through another smaller die. The wire was such worked until the proper diameter was achieved. It was early wire, the wrapped version, and not the drawn that was originally used by the Celts, about the 5th Century BC, to form the first pieces of mail. The term mail is frm the French word maille, which is further derived from the Latin word macula, which literally means mesh of a net. It is easy to see why such a word would be used to describe this metal cloth that so resembled a fisherman net.
|
|
|
In the European theatre the rings were generally passed through four others to form a tightly woven pattern of wire, often referred to as four in one, or four rings joined by one. This is the mail of the time, and is the primary, if not sole, pattern of the European, Celtic, and Norse warriors. Surviving pieces of mail from the first century AD show this mail to have been rivetted, welded, stamped, or butted. The rivetted mail was used to join the welded, or stamped rings together. Rivetted mail was made by first curling wire on a dowel or rod until a coil was formed. This coil was then cut into many rings by a set of wire cutters or a chisel. The rings were reduced in diameter by pushing them through a conical die, similar to the drawing technique previously discussed. This left the ring with an overlapped area that was flattened with a hammer and then punched with a hand punch or iron rod. The punched rings were then closed by a small rivet, similar to a modern day staple. If the mail item was to be made of all rivetted rings the rings were then joined together by other punched rings to form the four in one pattern, and only then would the non rivetted rings be finished. If the rivetted rings were to be used to join welded rings then the rings to be welded would be cranked on a rod the same approximate diameter as the finished diameter of the rivetted rings. The welded rings would be forged until they could be heat joined and then they would be 'knitted' into the item under constructon. Stamped rings were knitted the same as welded, however they were created by punching out the shape of the ring from sheet metal. The pieces that have come down to us from the past show a center bar inside the stamped ring, to add strength. Even though this process was time consuming and extremely expensive: a suit of mail could cost as much as five war horses, it was the best protection at the time. The closed rings were strong enough to withstand the severe blows of the ancient weapons, without openning up to easily. Butted rings were used at that time as a quick fix to a piece of armour until it could be brought back into the shop or to a field armoury for repair. This was evident for mail was so prized that the pieces that have survived are worn thin enough to be able to be broken by hand pressure, suggesting generations of wear. Mail continued to be used as the primary armour until the 15th century when plate began to replace it. Mail, however, was still used under plate to cover the exposed areas such as the arm pit and elbow joint. |
|
|
The mail used by the Europeans, which includes the British Isles, Europe, and Scandinavia, are all similar in pattern and principle design. The COIF was the close fitting mail hood used between the 11th to the 14th century to ward off blows or injury to the head either under a helm, or used by itself. The coif would be either attached to the hauberk at the neck with a flap that could be drawn across the face and buckled or strapped to the side of the coif, or worn free standing, with a mantle extending to the sternum for neck and throat protection. In either case the coif was made to cushion a blow to the head or helm, and keep the wearer from being cut by glancing or light blows. The AVENTAIL also called a CAMAIL had a similar function as the coif. It was the mailled portion that hung from the base of the helm to protect the trachea and neck. They were attached to the helm by a strap or a series of rivets at the base of the helm that allowed the camail or aventail to hang freely. The aventail was widely used until the 16th century when it was gradually replace by the gorget; the hard leather or metal collar that fit under the head and over the collarbones to protect the neck and throat. The last major piece of upper shoulder armour was the BISHOPS' MANTLE. The bishops' mantle was named for the shoulder covering of the clergy at that time, and protected that portion of thebody, the shoulders and usually as far down the front and back as the sternum and mid spine. The B/M began at the neck with a leather strap that buckled it in place and then extended in a circular pattern out to the shoulders. The B/M when attached to the helm became an aventail. To cover the chest and lower body parts the warriors wore a HAUBERK or BYRNIE. This was a shirt of mail, either short sleeved, ending at the elbows, during the first part of its use, or long sleeved, with flaired cuffs often extending over the hand, during the latter part of the middle ages. Slits were applied to the front and back of the shirt to allow mobility and in some instances the crotch area was left open to allow horse riding. In addition a flap could be drawn from the back of the shirt, through the crotch, to the front of the shirt to act as a protection for the genitals. This was referred to as a BREKE OF MAIL.2 Until the 14th century the hauberk was the primary armour of the warrior. After the 15th century, however, the plate became the primary form of armour, and the hauberk was used as an undercoat, designed to fill in the gaps left open at the elbows and arm pits. When a warrior wore a metal breast plate he would often use a mail SKIRT or FAULD to protect the lower body parts, usually extending to above the knees. In the beginning the term fauld was used to describe mail exclusively, but as plate became more widely used the fauld became part of the armour of the time, and was formed out of metal. The mail fauld was useful in slowing or stopping blows to the inside leg and crotch, from either the front or the back. Other pieces of mail used during this time were the BREECHES, or PANTS of mail held up by suspenders over the shoulders, and usually with feet attached. The feet were mail coverings over the top of the foot and attached to a leather piece of sole for comfort and mobility. Although GLOVES are often represented as being widely used in the middle ages the hands were more likely to be covered with MITTENS. The mittens were attached to the sleeve of the hauberk and held onto the hands by leather strapes that ran across the palms. Mittens could also be used as stand alone armour, at which time they were strapped to the wrist, similar to our present day wrist watch strap and then lashed across the palm. Either way they were a solid piece of mail the covered the four fingers, with independent thumb covering. Finally, the last major part of mail was the SLEEVE. The sleeve was strapped to the gamberson and the shoulder, affording upper and lower arm protection, without the added weight of the hauberk. Sleeves were designed for the situation and therefore would or would not have mittens attached. |
|
|
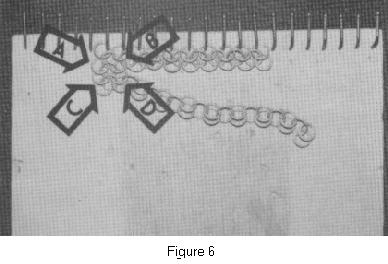
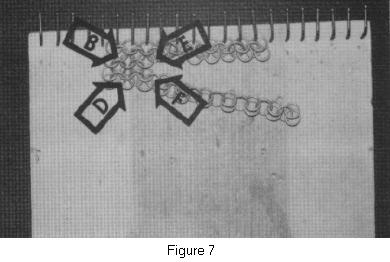
Oriental mail patterns, or more specifically Japanese mail patterns, were completely different from the four in one mail of the Celts. The philosophy of need; that reason that mail was created in the first place, is identical. Mail in Japan was used to join other pieces of armour together and to negate weapons effects to the body. Japanese mail was rivetted. Surviving pieces, and there are more existing than European mail, show that even rings as small as 1/4 inch outside diameter made of as small as 18 gauge wire was rivetted. This should not be surprising since the Japanese were a nation of edged warriors and non rivetted mail would not long survive, nor its wearer, if rings separated easily. There are six patterns of kusari, the Japanese word for mail.3 By the density of the patterns, usage is relatively evident. Patterns A through D are combat patterns. They were used n strips to guard areas most vulnerable to sword and spear strike. They were also used as shirts and coifs, worn by the foot soldiers of the period. These foot soldiers, (ashi-garu), were outfitted by the lord and therefore, as their European counterparts, were more or less armoured as the financial level of the lord permitted. The final two patterns, E and F, were court patterns. These were often worn under teh kataginu, and over the kimono and hakana. The idea was that even though a warrior trusted his lord enough to leave both swords at the door he still was protected against surprise attack and ambush. Furthermore, in a land ruled by face and honour, a warrior could openly say that he did not fully trust the lord and choose to arrive armoured. |
|
|
Before you can start knitting there are certain pieces of equipment necessary:
MAKING CHAINS AND CLOTH CHAINS:
NOTE: When you run out of chains make more by starting at a. CLOTH:
NOTE: When your piece gets long enough to spill over the bottom of the board remove it and re-set it on the nails in the same manner as #1. "Getting Started" Figures
|
|
|
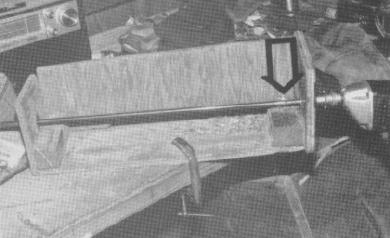
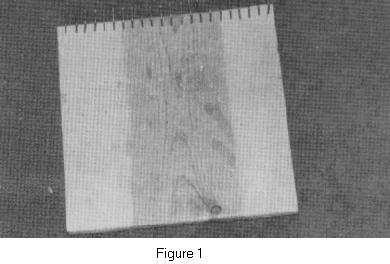
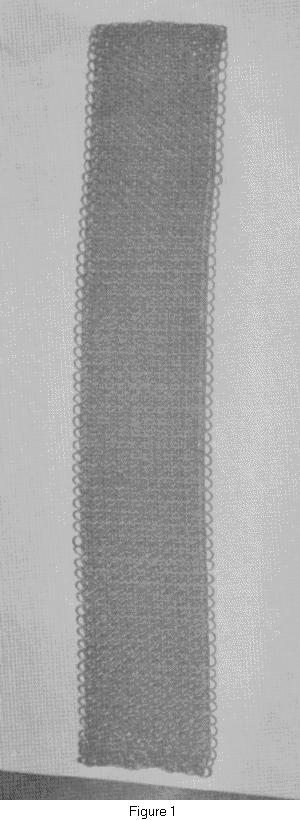
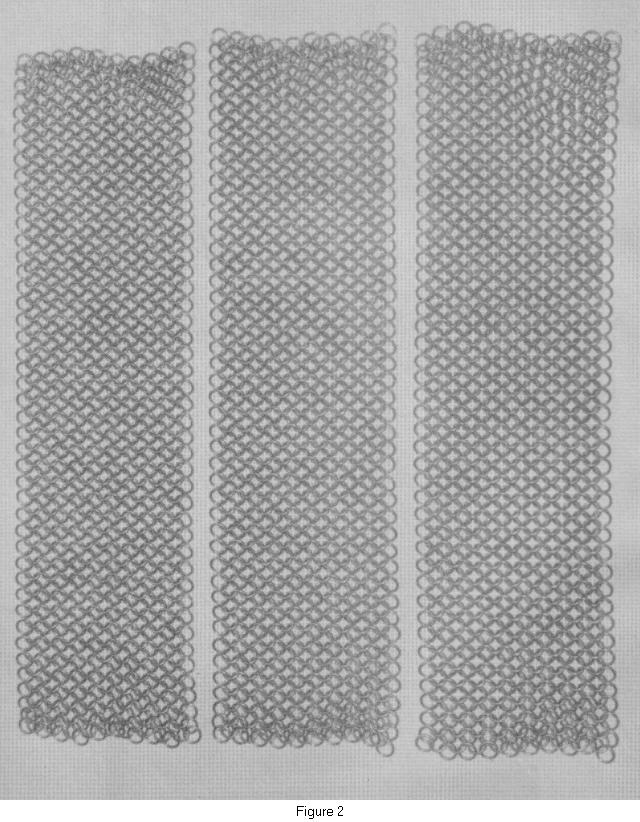
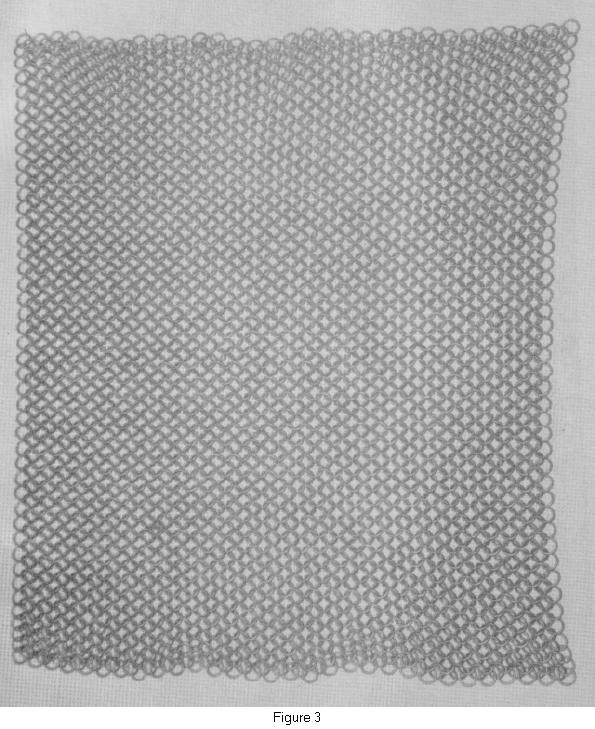
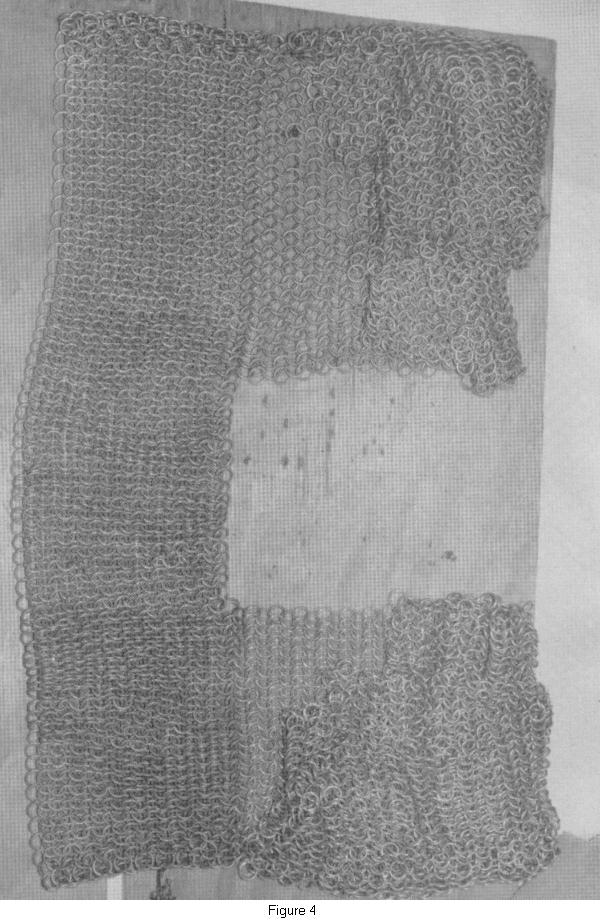
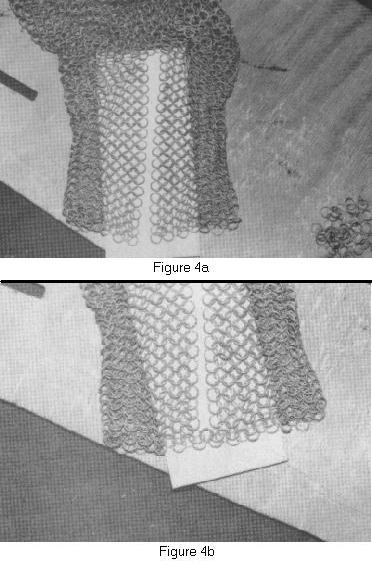
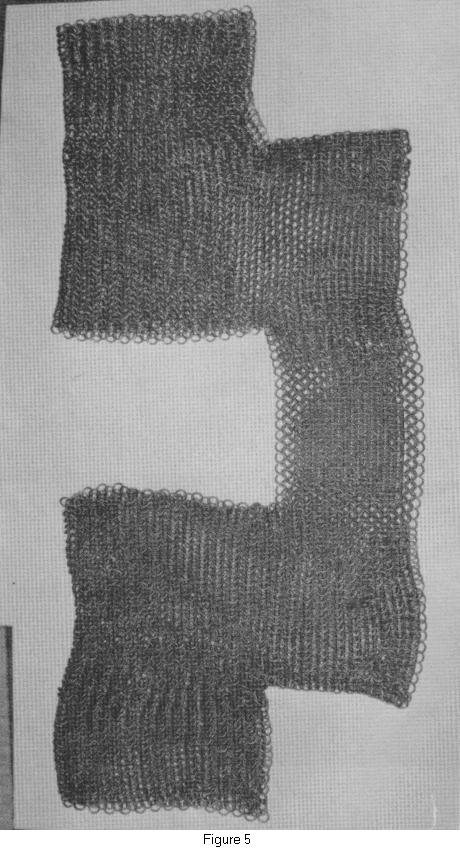
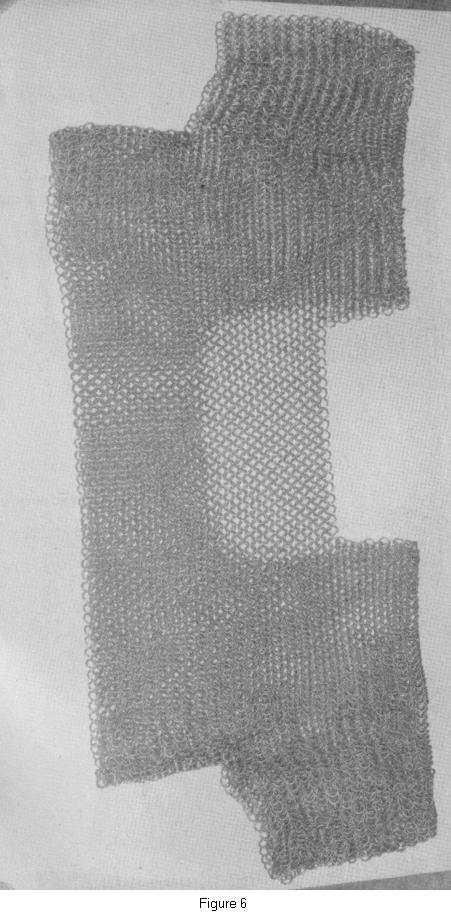
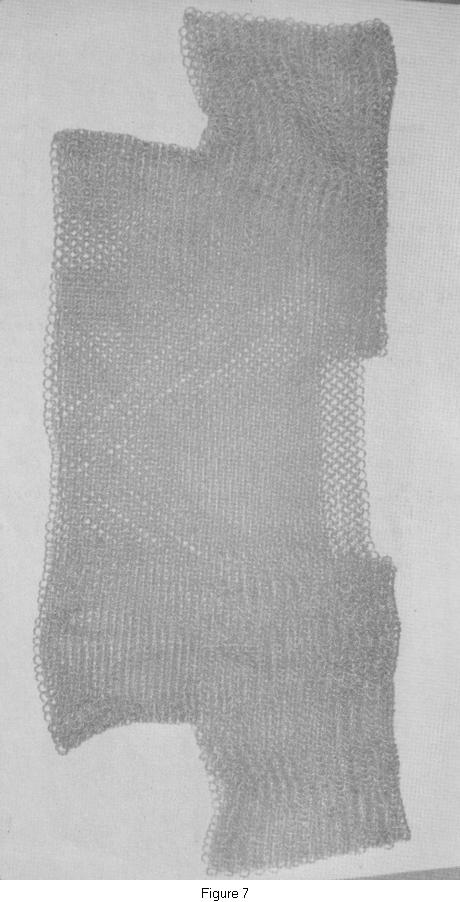
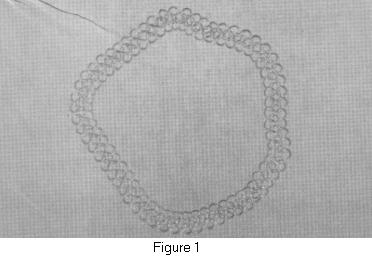
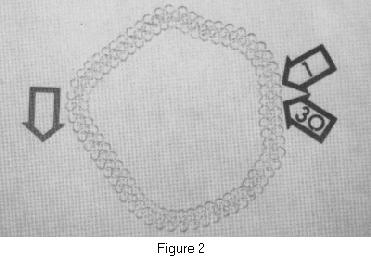
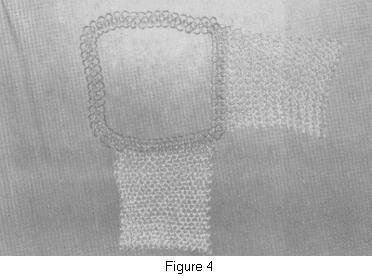
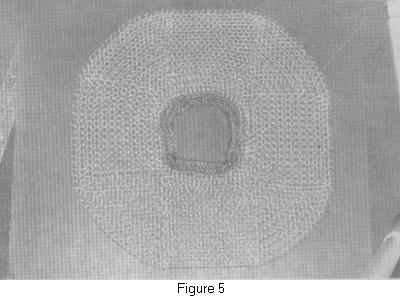
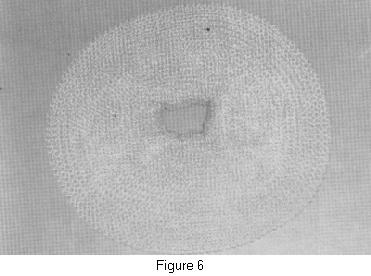
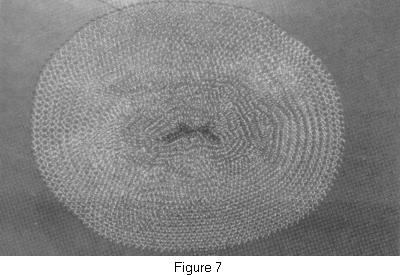
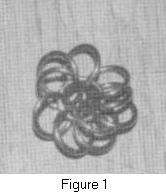
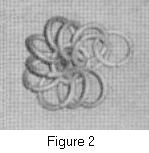
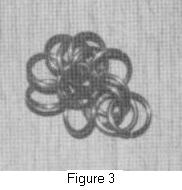
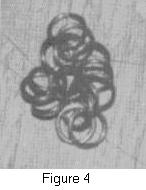
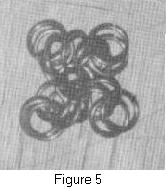
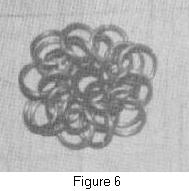
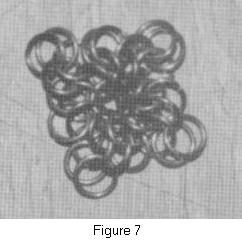
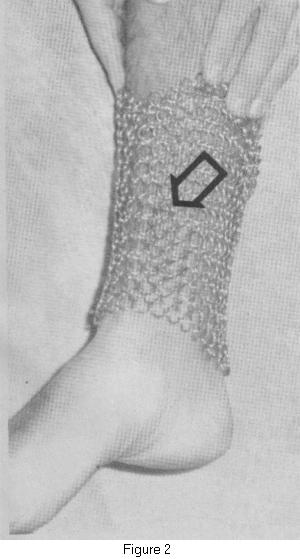
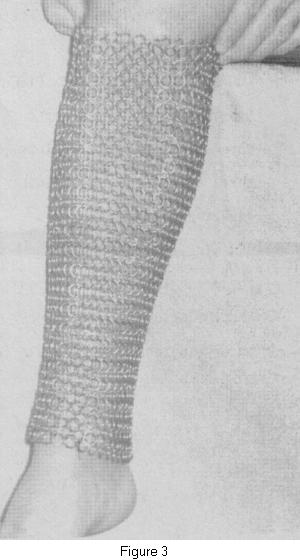
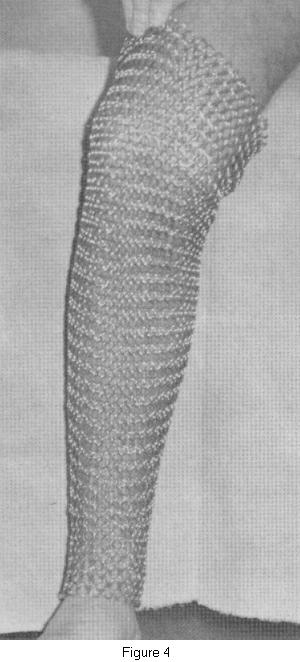
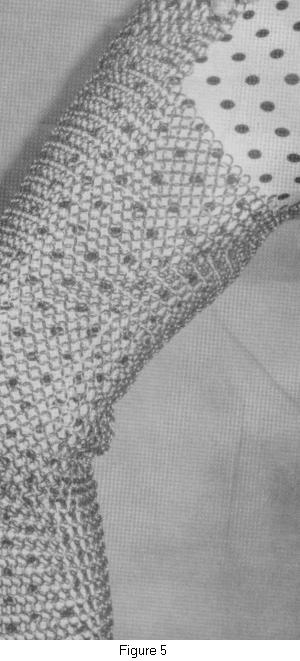
Take a piece of cloth long enough to comfortably fit around you in your most cumbersome garb, i.e. padded gamberson and sweat shirt if you fight in Northern winters. Close it into one piece, fig 1, in the same manner as you knitted the cloth. Knit two sleeves, fig 2. Do this by putting on the chest piece and measuring how much room you need for sleeves. A tape measure will work well, or string tied to the shirt at approximate shoulders. When you know how wide it must be measure from your collar bone to as far as you wish the sleeve to go on your arm, i.e. elbow, bicep, etc. You now can make the sleeves; by knitting cloth into the necessary size. (fig 3). NOTE: Mail spreads when you breath, therefore, you are knitting all your mail sideways. To attach the sleeves lay the chest piece on a large flat surface, a hanger body works very well. (fig 4) Make certain that all your connections are equal, i.e. if you have 11 rows on one side, have 11 on the other. Once the sleeves are attached turn them over and join them. (figs 4a, 4b, 5) The last ring will probably only have 3 to fit in due to the mathematics of the rings. Close in the front to fit. (fig 6) Close the back of the shirt. Knit a piece large enough to fit comfortably across your back and neck. (fig 7) Knit another body piece and connect it to the shirt. Continue to your wishes. NOTE for movement of shirt longer than thigh length a slit is usually desired. See Hauberk text. Slits are mode by removing rings to desired length. Hauberk Construction Figures
|
|
|
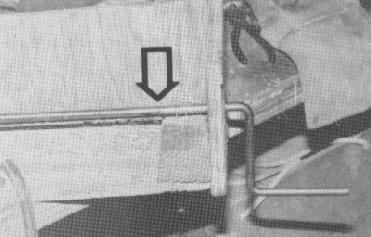
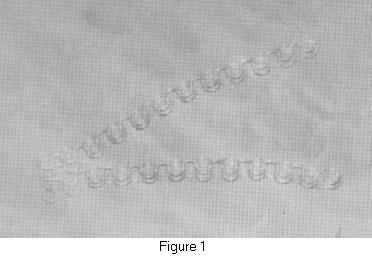
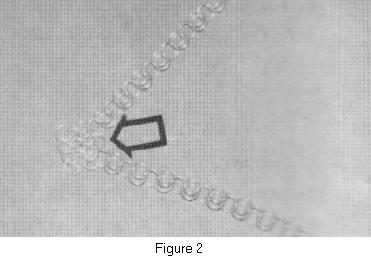
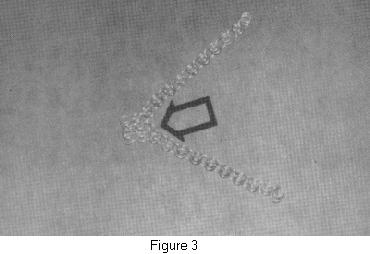
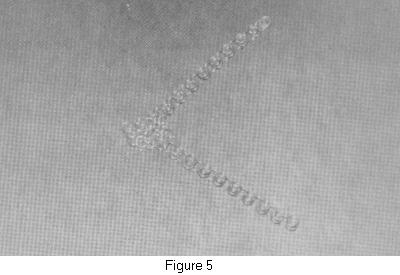
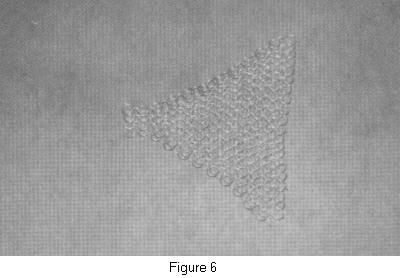
The expansion panel is used primarily for expanding specific areas of a piece of mail, i.e. a coif or fauld hip. To expand a specific area lay out the pieces as shown in fig 1. Each of the sides should be equal length. Connect the two single rings with one ring at arrow fig 2. That completes the first row. Ring the first two rings of row 2 (fig 3). Complete the row. Start again with row 3 (fig 4). Complete the row (fig 5). Continue to do this until all rows are completed (fig 6). There should be a discernable pattern when you complete this procedure. It will appear as a triangle inserted into the mail. As long as the work is balanced on all sides it should not detract from the appearance. Expansion Panel Figures
|
|
|
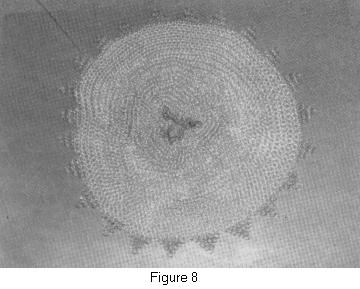
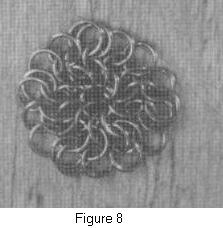
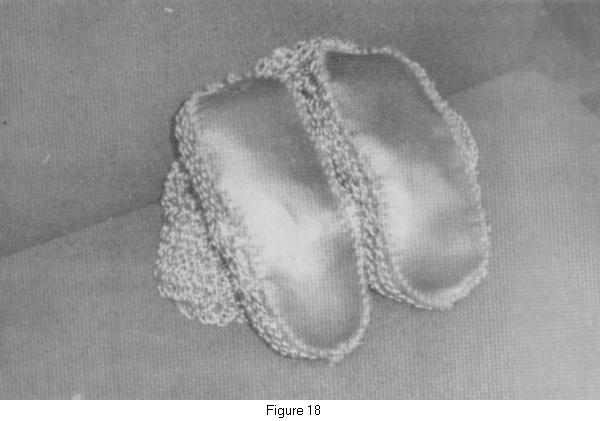
The bishops mantle is a circular collar of mail that usually falls over the shoulders, with or without dags attached; dags are small triangles that are applied at the edge of the mantle. To begin, measure your head size and add three inches to allow the opening to fit over your ears and nose. Knit enough ringlets to equal measured length and connect to form rows one through three. (fig 1) Count the rings in the outer row. (fig 2) Divide by 4 (Ed: e.g. fig 2 shows 30 ringlets; 30 divided by 4 is 7.5 ringlets.) Knit four pieces of mail five ringlets wide for adults, three for children, as long as the number you got when you divided. (fig 4) (Ed: If the number ends in "1/2", you can add rings to represent 1/2 a ringlet. If the number ends in "1/4" or "3/4", you must make some panels 1/4 a ringlet wider, and some 1/4 a ringlet narrower, so the sum of the four panels still adds up to the total.) Close in the four openings (fig 5) as shown in Explansion Panel. If you wish the mantle to hang over the shoulders in a more conical manner attach another piece of mail to the mantle without an expansion. (fig 6) The mantle is now complete. For dags, count the number of ringlets in the outside row. In the example there are 69. (fig 7) Divide that number equally to determine number of dags. 69 divided by 3 equals 23 dags. (fig 8) If there is no equal number, or if you want larger or smaller dags, add or subtract rows. Bishops Mantle Figures
|
|
|
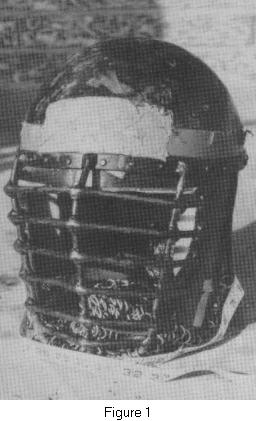
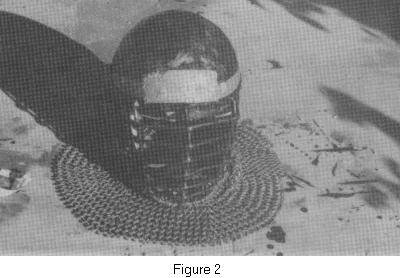
The aventail or camail is the mail piece that fits below the helm to protect the throat and neck. Measure the outside diameter of the helm (fig 1. Identify whether you want to attach the mail by strap or by drilling individual holes for each ring. The helm at fig 2 is attached by rings. Follow the directions for a Bishop's Mantle. Aventail/Camail Figures
|
|
|
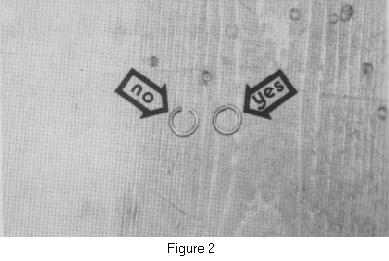
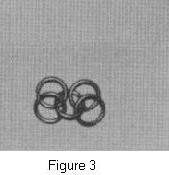
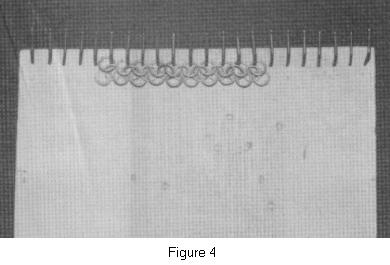
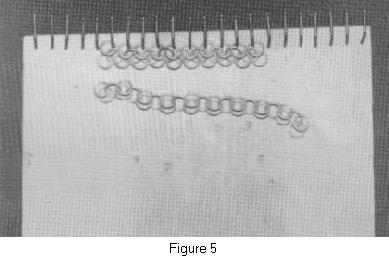
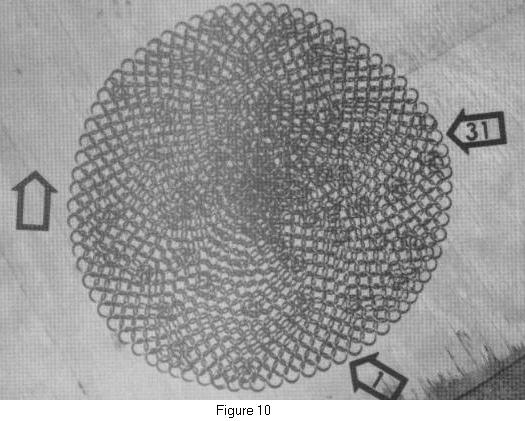
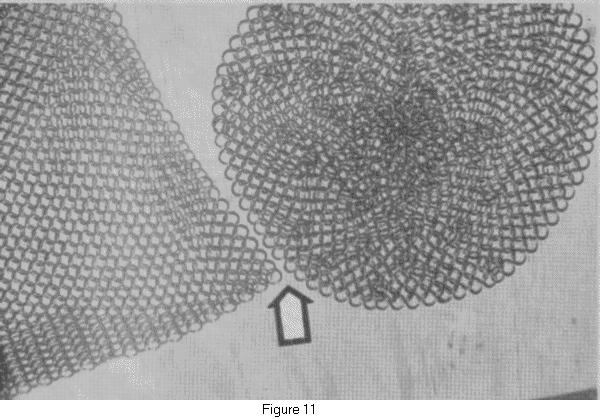
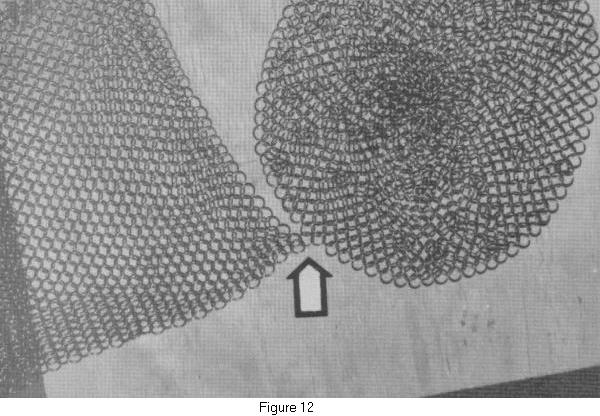
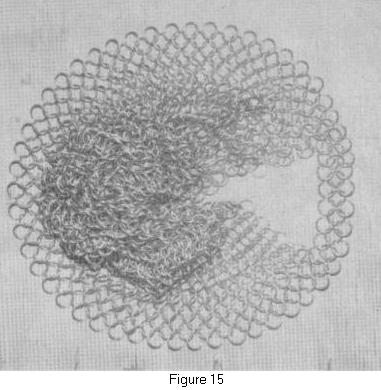
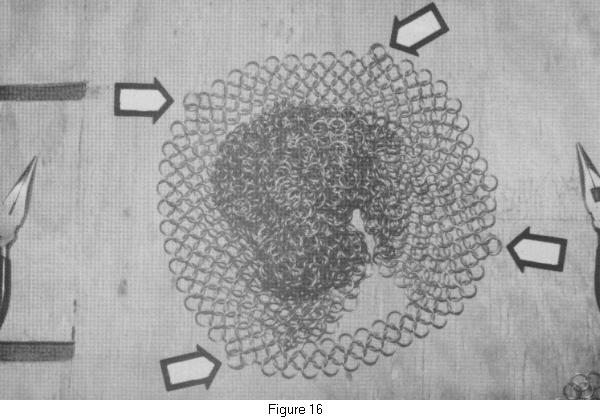
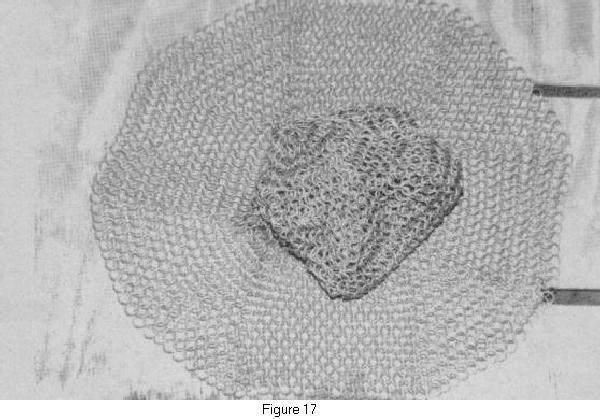
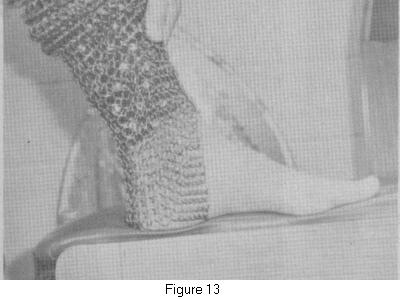
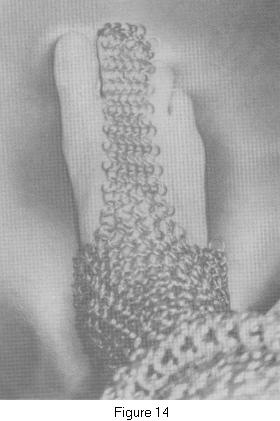
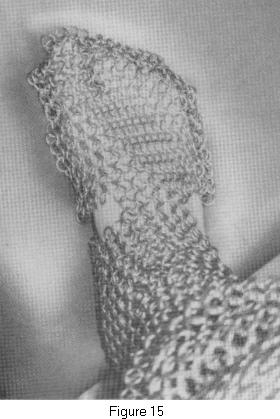
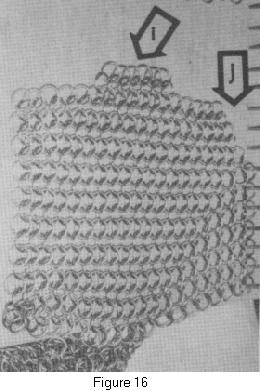
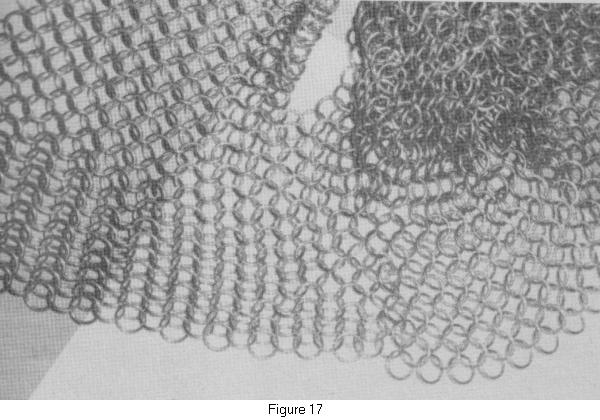
Close ten rings. Place those ten closed rings on one open ring and close it (fig 1). You now have one row completed. Place one ring through two of the adjacent rings of row 1 (fig 2). Place a second ring through the same two rings you placed the first one through (fig 3). Repeat the operation with the next two rings (fig 4). Skip one ring of row one and repeat the operation two more times (fig 5). Lay your coif on the knitting board and connect the remaining rings of row one with single rings (fig 6). You have now completed row two. To begin row three close two rings through two rings of row two at four equally spaced points of the coif (fig 7). Fill in the rest of the row with single rings (fig 8). Repeat this process until you have ten rows completed. Rows eleven and beyond will have three sets of double rings (fig 9). Fill in the remaining rings with single rings. Begin trying on the top of your coif anytime to get a proper fit. It should sit flat on your head and come to just above your eyebrows. When the top is completed proceed. You now need to make the side. To identify how long to knit the panel for the side place the coif on your head and measure how wide you wish the facial opening. Mark the two side rings with tape and count the number of rings remaining (fig 10). That number divided by two will correspond to the number of chains you need to knit. To knit the panel see making chain and cloth. To attach the side to the top lay out the top on a large flat surface, such as a table top, shield, or hanger body. Lay your side panel next to the coif int he manner shown in fig 11. Connect the side to the top in the same manner you connected the chains together (fig 12). To close the coif put the top with side attached on your head and measure how wide at the chin you wish it to be. Fill in that space with ringlets (fig 13 - 15). Once the chin is closed begin to expand the bottom either with four sets of double rings as you did above (fig 16). Continue until the coif is the desired length or use expansion panels. To use expansion panels, which is quicker, but does not give the coif a perfect roundness; the panel causes the bottom to be octagonal, divide the coif into four and attach four pieces of cloth as long as you with the coif to be. Expand the four openings as shown in Expansion Panel. This process is identical to the aventail and bishops mantle. You have now completed your coif (fig 17). Coif Figures
|
|
|
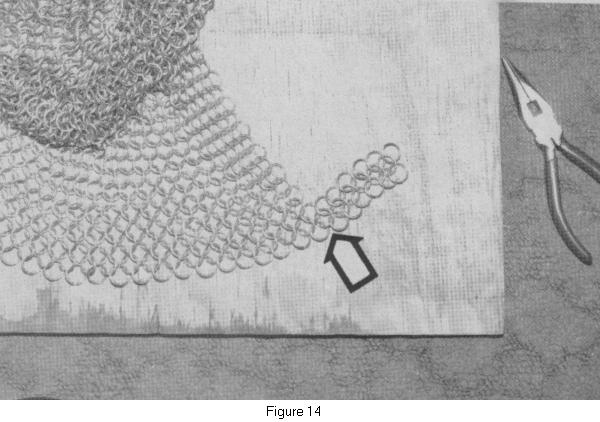
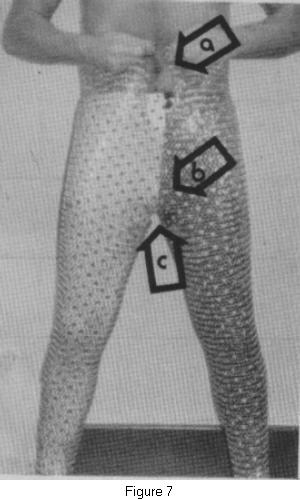
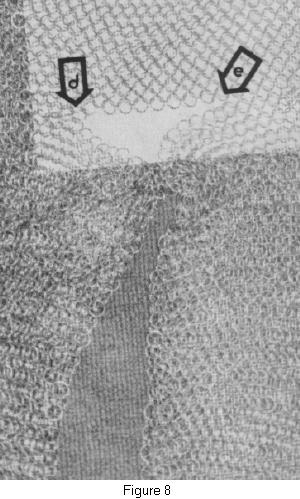
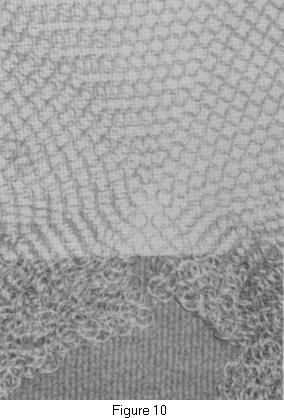
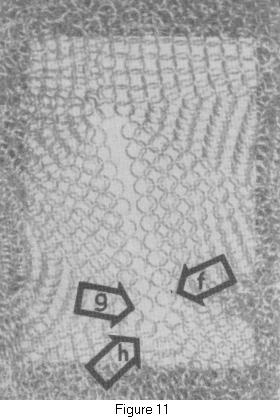
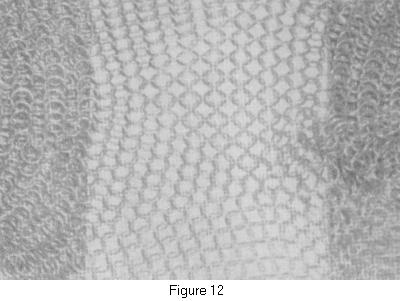
The pants are another item that must be form fitted to the individual. Each set of legs, or in some cases, each leg is of a different size and configuration. Therefore these directions that follow are for a pair of legs that are of average size and length. To start knit a piece of cloth three ringlets wide and as long as necessary to fit over the ankle without being loose. (fig 1) Knit a piece three ringlets wide and two ringlets longer than the first piece. Add an expansion ring at four points to your first piece of cloth and attach to second piece (fig 2) (the arrow shows an expansion ring attached to the cloth). Continue doing this with two sets of siz wide cloth, four expansion rings each. (figs 3-5) To fit up over the hip knit a piece that covers the hip but leaves the crotch and rear areas open. (fig 5) Repeat figures one through five until you have two legs completed. (fig 6) Connect the two legs toegether with cloth, (fig 7) and leave room at the navel for a tie, (fig 7,a). Close in the crotch area and rear areas with pieces of cloth, (fig 7,b) and prepare to close the under crotch area. (fig 7,c) Alternating sides connect the leg portion of the pants to the body portion. (fig 8,d+e) Continue front and back until you have joined all rings. At this time you will have an opening that extends from the front to back along the bottom of the pants. (figs 9 + 10) Close that opening by starting at arrow F, fig 11, opening that ring, passing it through rings at arrows G + H, and closing the ring. Continue as such until all rings are joined in a four in one pattern. (fig 12) Knit a piece long enough to go from the sides of the foot to the sole of the foot. (fig 13) Next knit a piece to fit across the top of the foot and to extend over the toes. (fig 14) Make two more pieces, (fig 15) to fit from the top of the foot to the sole. Extend the pront of this piece as in fig 16,i and trim the piece for the smaller toes as in fig 16,j. Connect the sides together using a modified expansion panel. (fig 17) Finish the pants by sewing a piece of leather to each foot. (fig 18) The pants may be worn with suspenders, or loosely by tying the front opening together. For best fit use both a tie and suspenders. LEG LENGTH AND WIDTHS OF PIECES:
Pants/Chausses Figures
|