|
|
|
These Patterns are free to all with the understanding that credit should be given to the owners. |
|
Go to the Authors Original Site Floating Elbows
Patterns (Click on thumbnail for full-size image)
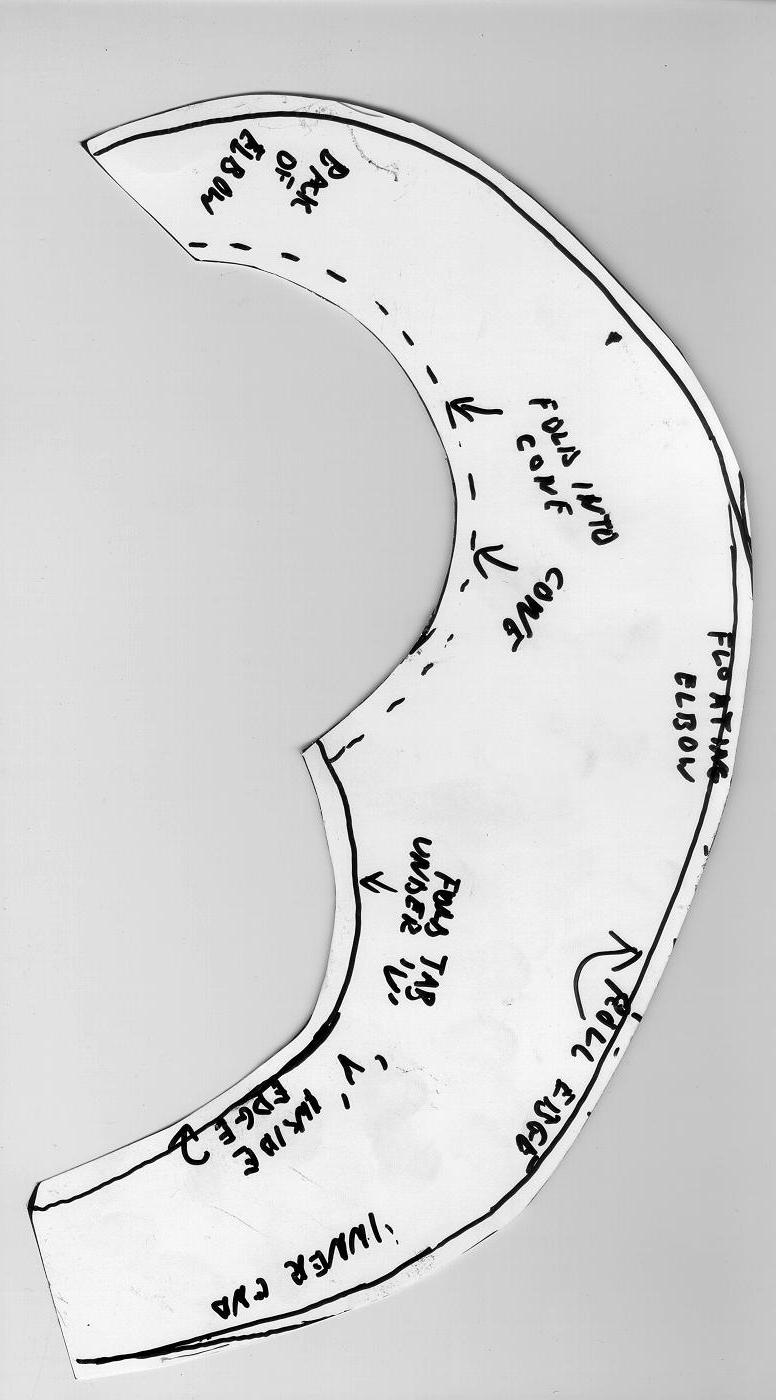
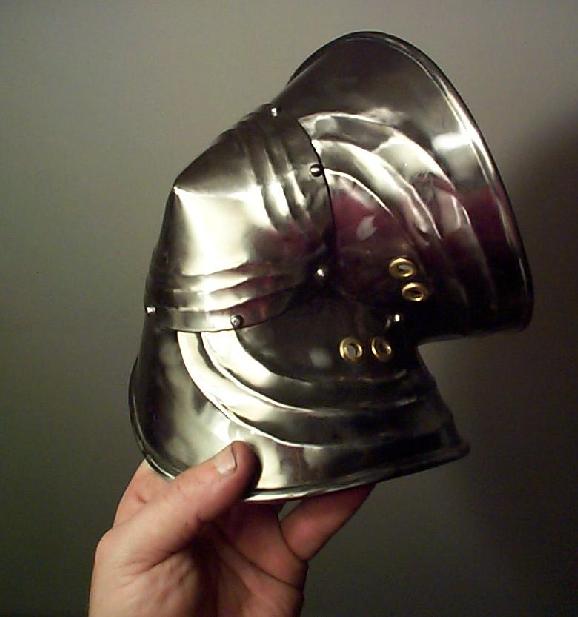
The floating elbow for the stainless steel armour suit posed quite a problem to make since I don't have a TIG welder and forming the pieces hot would take a very long time with a torch. Heating the stainless steel would also vastly change its properties and destroy some of the corrosion resistance. So, I decided to break the complex form into primitive shapes and form the thing in pieces that could be riveted together. Small rivets were used so they don't seem as noticeable. The larger rivets were used to attach the strap and buckle. Below are the pictures of the finished elbow. The fluting was made with just a dull chisel from the backside with the front face supported by a block of lead. That's about as much work that went into the detailing since this is a quick job and it will get dented up in SCA fighting anyhow. The outer edges were rolled in a sheet metal roller jenny tool and closed up with hammer blows over the lead block. The fluting was done after the pieces were fully shaped but not yet assembled. The holes for the grommets for the arming points also had to be made before the parts were riveted together. The straps and padding were added last. Two pieces using the first pattern must be made, mirror images of
each other of course. The only difference between the two is that the
1/4" flange that folds under the "V" of the inner arm curl is
only on one of the two parts. The two sets of arming point holes are
used to secure the elbow to the gambeson. Also, the holes are tied to the
lower vambrace and upper rerebrace of the arm defense so the entire arm is
linked by points of leather strap from the vambrace all the way up to the
pauldron and gorget. This gives the entire arm defense support and
keeps parts of the armour from slipping out of position. One note in
the overall shape of armour in general must be made. In armour, there
are no perfectly straight lines, flat areas, or tubular shapes. The
human body is shaped in complex and often subtle curves. Since armour
is made to fit the body, good armour reproductions should should not reflect
the fact that you started with a flat, rolled piece of steel, since the
original armourers started with steel that was hammered flat and varied in
thickness. Real armour is thicker where it needed to be and thinner
where weight could be saved. The piece below is less than historically
accurate in shape not only because is it made in parts, but also because it
retains much of the flatness of the individual pieces as they were curved in
two dimensions. The overall shape is close, but not exactly
correct. Nevertheless, the shortcuts used do not detract from the usability
of the elbows. |
|
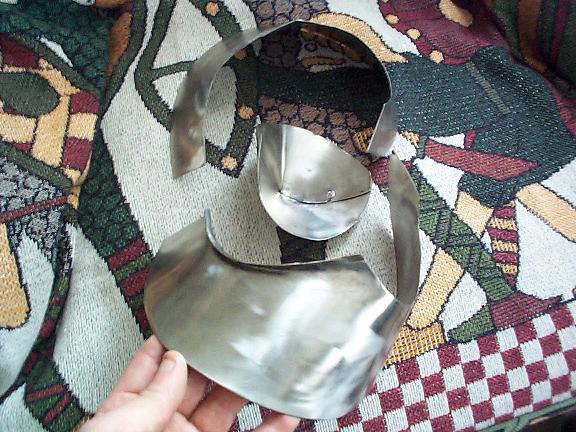
Here are the pieces of the elbow formed to their rough shapes. Fit the pieces near to their final shape before over a bichorn with a rawhide mallet takeing care not to make noticeable creases in the curves. The two flange parts have a subtle twist in the curvatures, and the root line of the "V" must be in the same plane for both parts to form a gap-free joint. The cone is held in shape by a single rivet before fluting it. | |
|
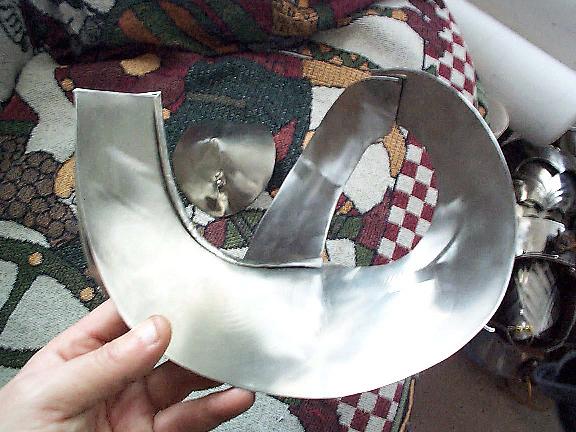
You can see that the root of the "V" has a 1/4" wide fold which will be riveted with small 1/16" rivets. After the outer edges are rolled, look at the area at the rear of the elbow, where the rolls would overlap. A short section of the roll on the underlapping plate is cut away so the roll ends touch end to end. | |
|
Front view showing rivet locations and "V" curve of inner arm protection. | |
|
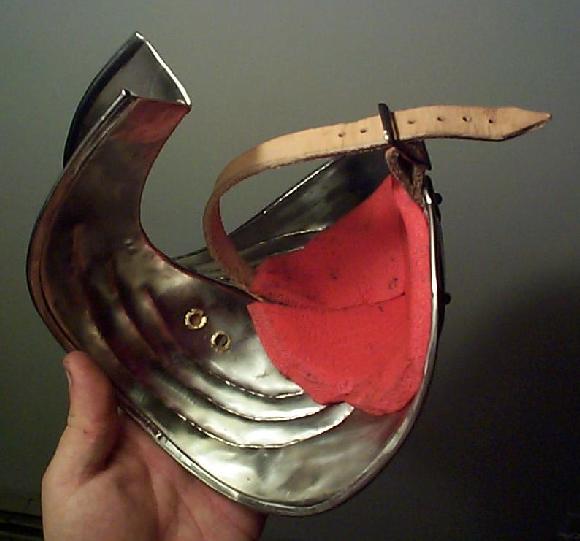
Inside view showing glued in foam padding and strap. | |
|
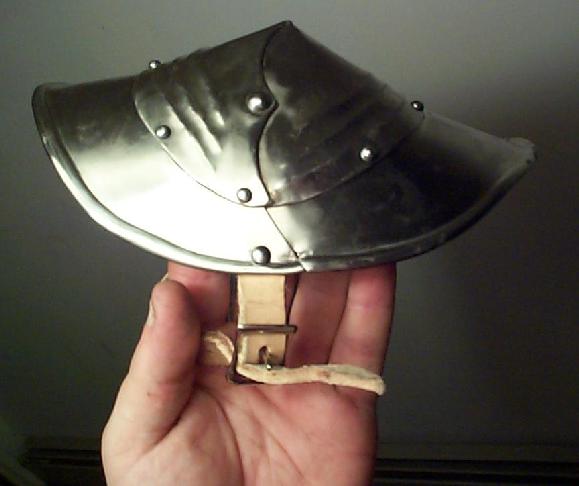
Rear view showing cone profile and overlaps. |