These Patterns are free to all with the understanding that credit should be given to the owners.
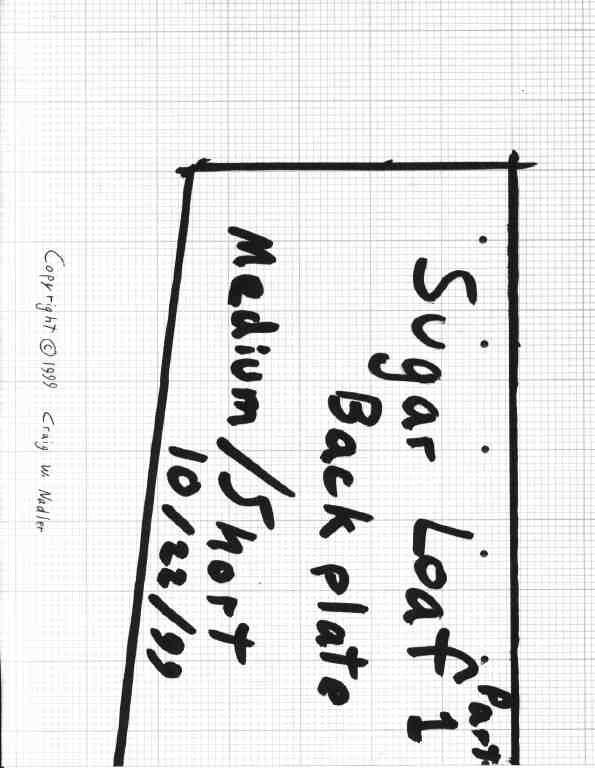
Back Medium Short P1
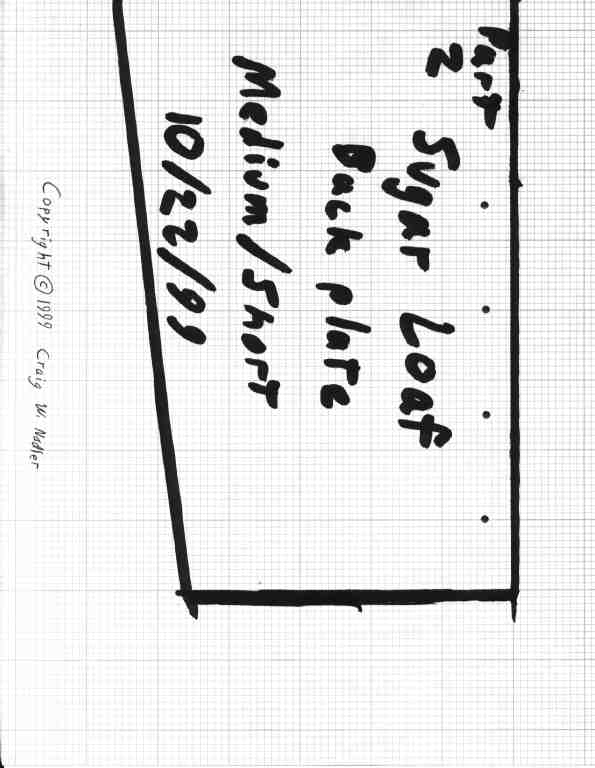
Back Medium Short P2
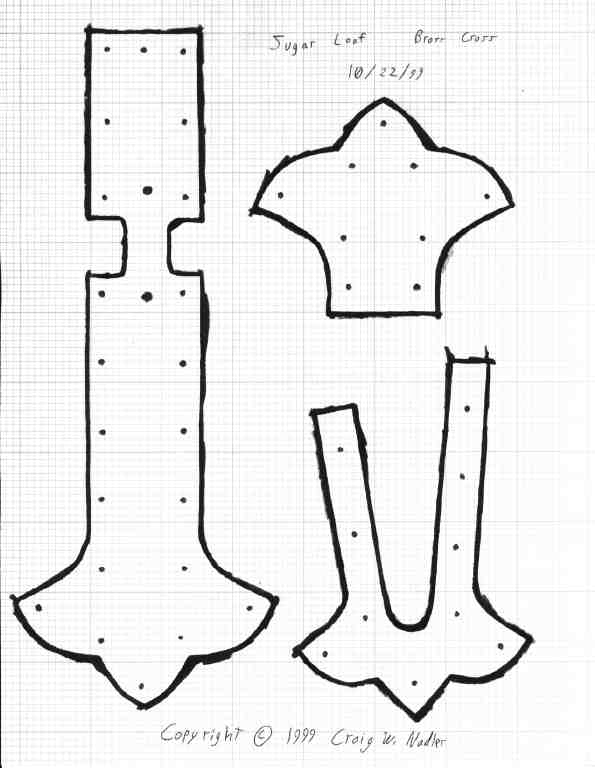
Brass Cross
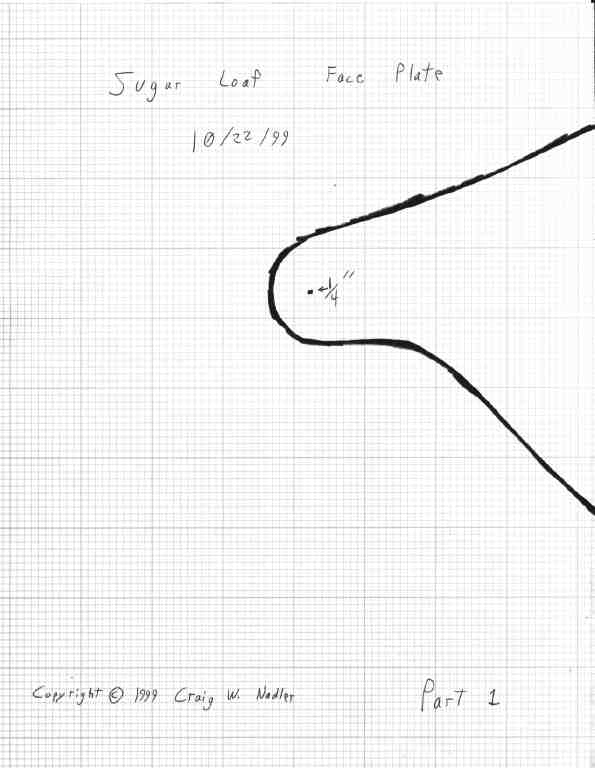
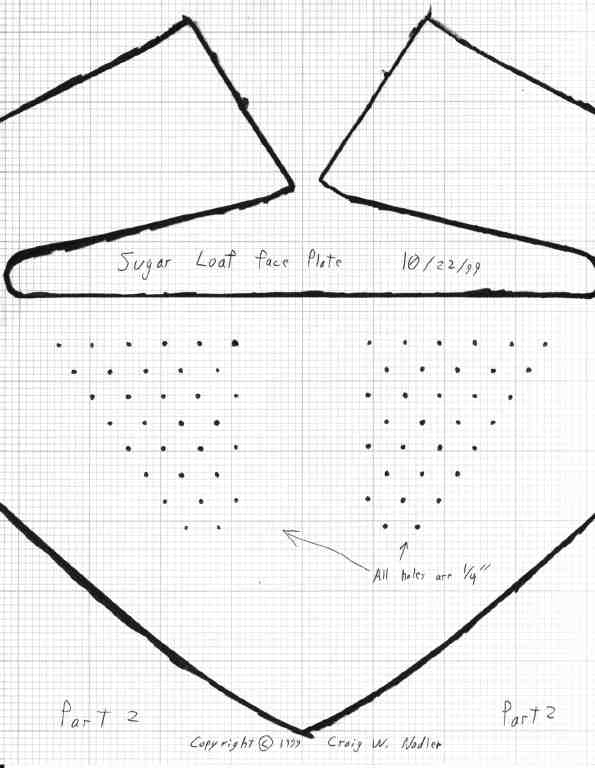
Face Medium Short P1
Face Medium Short P2
Face Medium Short P3
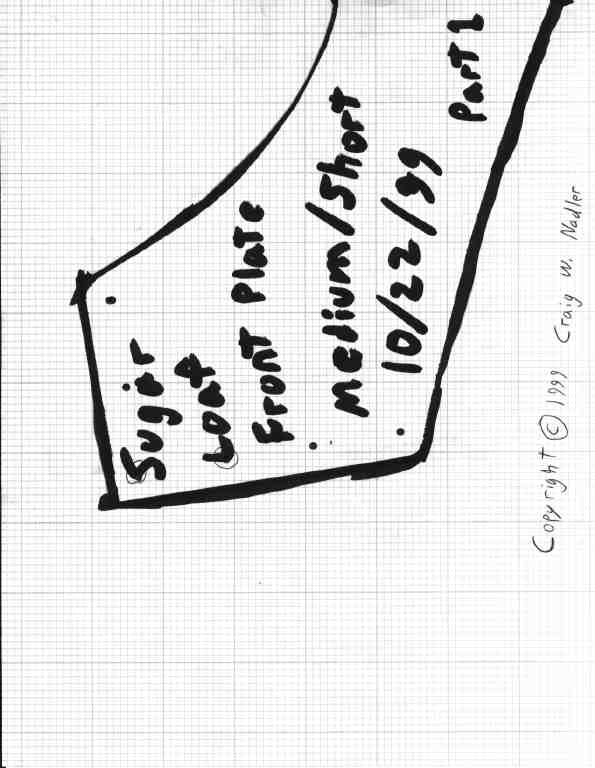
Front Medium Short P1
Front Medium Short P2
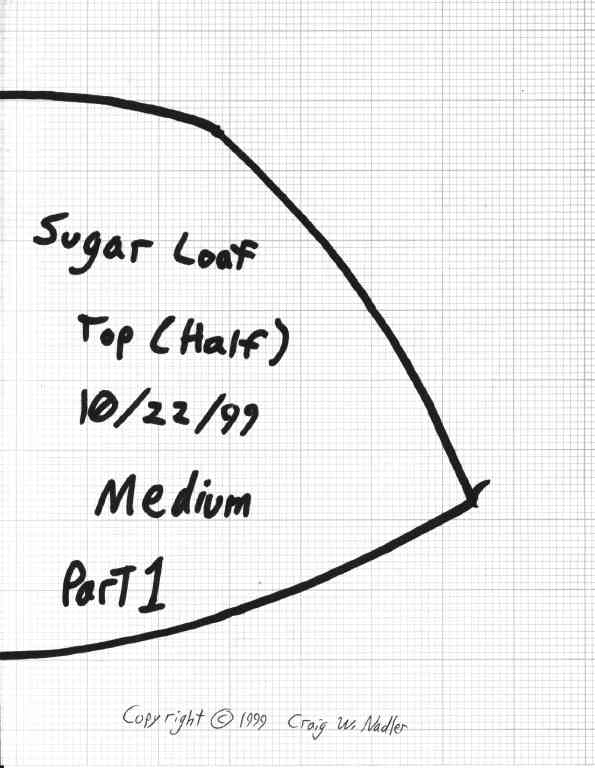
Top Medium P1
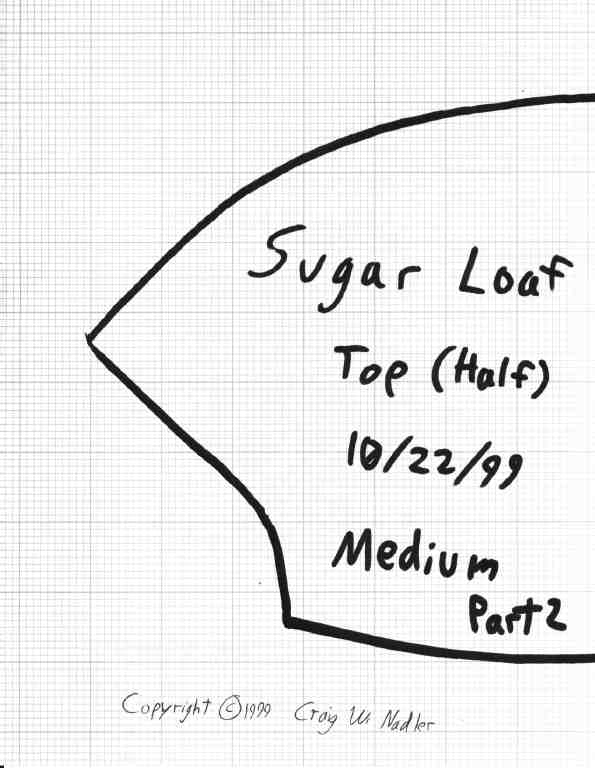
Top Medium P2
I would build this helmet in the following order:
- Cut out the plates.
- Finish the plate edges and corners.
- Punch or drill any holes marked on the patterns
- Dish and shape the top halves.
- Weld the top halves together.
- Grind the weld flush on the outside and cleanup weld
on the inside if needed.
- Polish the helmet top to a medium finish. (I use 3M
surface conditioning disks)
- Shape the back plate to fit the helm's top.
- Polish the back plate to a medium finish.
- Rivet the back plate onto the helm's top.
- Shape the front plate to fit the helm.
- Polish the front plate to a medium finish.
- Rivet the front plate onto the helm.
- Shape the visor and fit it to the helm.
- Weld the brow part of the visor together. Grind welds flush on
the outside and cleanup welds on the inside if needed.
- Fit the visor to the helm and mark where you want the two pivot
points.
- Drill/Punch 1/4" holes for the two pivots.
- I use 1/4" rivets for the pivots and drill 3/32" holes near the
end of the rivet shafts for cotter pins. This way I can remove the rivets
and change the visors. Be sure that the length of the rivets aren't excessive.
- Polish the visor and brass plates for the cross to the finish you
want when the helm is done.
- Rivet the arms of the brass cross over the eye slots.
- Rivet on the main part of the brass cross. Be sure to use a steel
reinforcement strip under the part of the cross that goes over the eye
slot (between the eyes).
- Rivet on the top part of the cross about 1/4" above where the top
edge of the visor is when closed.
- Drill two holes for spring pins about an inch apart centered on
the center of the top edge of the visor.
- Attach spring pins and adjust the holes for the pins as needed.
- Finish polishing the helm.
Sugar Loaf with Visor (c. Early 14th Century Style)
|
